# Product Data Source Editor
Each project requires at least one Data Source in order to provide product recommendations, although different data sources can be used for Draft and Production instances.
Clicking “Add Product Source” will ask you to select which type of integration you wish to use. The most common choice is “Salesforce Commerce Cloud – Open Commerce API” although it is possible to build a recommender project from other sources (see screenshot).
 Once you make a selection, you will be taken to the Data Source Editor.
# Connection Setup
TIP
This section assumes that you are using the Salesforce Commerce Cloud Open Commerce API (SFCC OCAPI) as your primary data source. If you require assistance with a different integration type, please contact your Drive Commerce representative.
When creating a new connection to the SFCC OCAPI you will need to provide an endpoint URL as well a Client ID.
This information is typically provided by your SFCC Administrator or Implementation provider. For more information on setting up an OCAPI connection, please see SFCC documentation here: https://documentation.b2c.commercecloud.salesforce.com/DOC1/index.jsp?topic=%2Fcom.demandware.dochelp%2FAccountManager%2FAccountManagerAddAPIClientID.html (opens new window).
Drive recommends creating a unique Client ID for each instance of Cartographer.
# Pick Categories & Hidden Categories
Once a successful connection is made, Cartographer will automatically download the category structure of the specified site.
Categories will be displayed in a “tree” structure. Each checkbox allows you to select a category for inclusion in the set of recommended products. Selecting a parent or root category will include all products assigned to its child- or sub-categories.

By default, SFCC does not return categories that are “Offline” or “Hidden”. To include categories that are offline (or whose parent categories are offline) please specify the IDs of those categories in the ‘Include Hidden Categories’ field. Press “Enter” or “Return” after entering each ID.

# Additional Product Data
Cartographer includes several tools to help augment data and reporting for your unique Recommender experience.
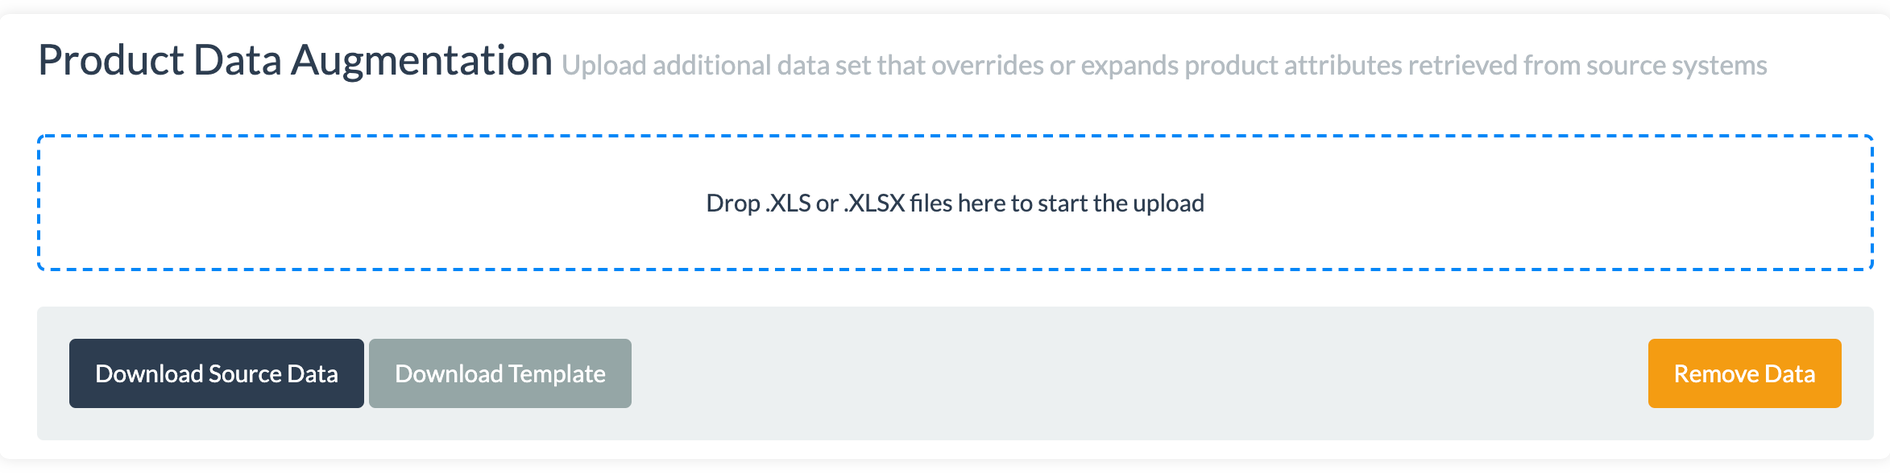
# Product Data Augmentation
Cartographer allows you to extend your product data using custom attributes specifically for use in a product recommender.
To begin augmenting your data, download this template and open it in Microsoft Excel (note: you can also edit your data in Google Spreadsheets and then select File > Download As > Microsoft Excel (.xlsx.) to save the file for upload). The blank template can also be found within this section on the Data Source Editor.
In column A, enter the product IDs exactly as they appear in Business Manager (ensure no extra spaces are entered). Beginning in Column H, enter the name of the additional attributes you will require in Row 1. For example, if you wanted to add a field for product color you might enter “Product Color” (without the quotation marks) in Cell I1.
Do not change the values in columns B through H unless otherwise instructed to do so.

For each Product, enter the value that corresponds to the Custom Attributes you have created. Blanks can be entered and will be treated as “NULL” values. Multiple values can be separated by commas.
Once you have completed and saved the data set, drag and drop the .xlsx file into the designated area in the Cartographer Data Source editor screen under the “Product Data Augmentation” section.
Note that if you have different data sources for Draft and Production versions you will need to update both with the same .xlsx file in order for recommendations to match in both versions.
Within the “Product Data Augmentation” section, you are able to download a previously uploaded spreadsheet (click on the “Download Source Data” button), make and save your changes, and re-upload the changes. Note that the re-uploaded changes will overwrite and replace the data from the previous spreadsheet.
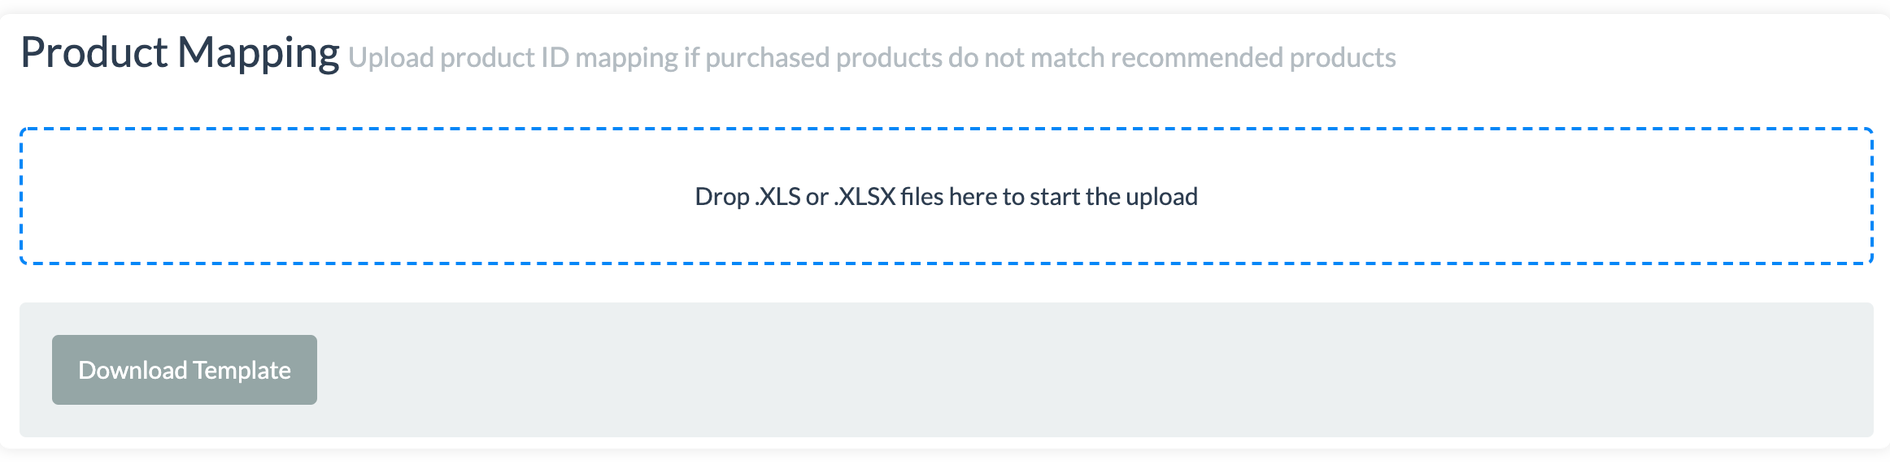
# Product Mapping
In certain cases, it may be necessary to map certain recommended products to certain other products which are not directly recommended, but whose sales should be tracked to the recommender.
For example, if your Recommender suggests a “base model” product to customers, but that product can also be purchased in a “Customized” or “Personalized” version (with a different Master Product ID) you can use the Product Mapping tool to ensure that if a customer receives a recommendation for the Base product but purchases the Custom version, that the sale will be counted as having been Recommended to the customer.
Similar to the Product Data Augmentation spreadsheet, once the Product Mapping sheet is complete and saved, drag and drop the .xlsx file into the designated area in the Cartographer Data Source editor screen under the “Product Mapping” section.
Note that if you have different data sources for Draft and Production versions you will need to update both with the same .xlsx file in order for recommendations to match in both versions.
Please ask your Cartographer representative for assistance using this feature if you believe you will need it for your recommender experience. You can download a blank template as reference. The blank template can also be found within this section on the Data Source Editor.
Once Product Mapping is set-up, you are able to download a previously uploaded spreadsheet (click on the “Download Mapping Data” button), make and save your changes, and re-upload the changes. Note that the re-uploaded changes will overwrite and replace the data from the previous spreadsheet.
# Scheduling
After a data source is set-up and connected, whether it’s through SFCC OCAPI and/or through the Product Augmentation Data spreadsheet, you will need to run an import of the data. Doing so will refresh the underlying product data that is used to support the questions created in the “Questions” section in the Project Editor.
There are two options for scheduling. You can run ad hoc imports by clicking on “Run Import Now” or you can schedule recurring imports to run hourly, daily, or a number of other frequencies.
 After an import is kicked off, under the “Import History” section, you will see the import activity and its status and who started the imported. There are 4 statuses and will update automatically based on the most current status:
- Scheduled
- Running
- Success
- Exception – will display when there are error exceptions in the import and Cartographer provides a read out of the error encountered. If you see this status, please reach out to support@drivecommerce.com for additional troubleshooting help.
With a successful import completed, you will be able to see the latest product data reflected in your recommender. You are also able to see the latest active data within the "Import History" section by clicking on the "View Active Dataset" button.
